With the advent of portable internet-connected devices, the standardization of operating systems (e.g. Android), payment processing protocols (e.g. Nexo), and contactless payment acceptance (e.g. EMV Contacless), the next generation of payment terminals set out to turn the world of retail payments into a convenient, straightforward operation.
When using Switch’s Terminal Application you will encounter specific terms which we address in the following table.
| Concept | Description |
|---|---|
| ID | This is a string of numbers and letters that identifies different Elements of your Terminal, or the Terminal in use itself. |
| Device | References to Device in your Terminal usually relate to that same device, the payment Terminal you are using. |
| Manual Insert | You can use the Manual Insert Option to allow your Customers to manually insert their card details (card number, expiration date, CVC). |
| QR Code | You can provide your Customers with a QR Code when they intend to pay using mobile applications. |
| Receipt | You can provide your Customers with printed receipts or digital versions of these files. |
| Redirect | Depending on the Alternative Payment Methods you make available in the Terminal application, you might employ Redirect to push the Customer to use external applications/devices to proceed with Payment (e.g. Alipay, PayPal). |
| Session | A Terminal Session represents the time frame you set for every day of Transactions in your store. The transactional data is compiled by Session and you are able to set the time of when Session should end in your Terminal. |
| Supervisor Code | Your supervisor code is the 6-digit code needed to authorize certain operations in your Terminal. During your Terminal's setup you will be asked to create your supervisor code, to do this simply enter, and re-enter, your chosen 6-digit code when prompted and confirm. |
| Transaction | The concept of Transaction within the Switch Platform includes Charges, Instruments, and Payments. It represents any Element that requires communication with a Provider. This means that the Transactions listed in your Terminal Application l include more elements beyond successful Payments. For example, they can include unsuccessful Payments, and Refunds. |
Terminal Settings
Terminal Settings have to do with how you operate your device. These concern your customer’s and collaborator’s user experience with the Terminal, how they identify your device, the payment methods they can employ and the ways in which they handle and retrieve information.
| Designation | Description |
|---|---|
| Language | This is the operating language of your device. Currently, the languages available are Portuguese (PT) and English (US). |
| Merchant Name | This is the name of the merchant, meaning brand or business, operating the device. |
| Supervisor PIN | The user who is going to be operating the device should have a Supervisor PIN. This PIN grants permission to the user to perform the day-to-day Terminal operations. |
| Maintenance PIN | The Maintenance PIN is used to grant access to the more technical settings of the device, this includes changing the time/date, or resetting the Terminal. |
| Daily Session End Time | The Session End Time is set by you and refers to the time when a cycle of transactions in Terminal comes to a close. It is commonly set for the time your store would close for the day. |
| EMV Reader Enabled | You can enable or disable the EMV Reader capabilities of your device. EMV is a global standard for credit cards that use computer chips to authenticate and secure chip card transactions. |
| Contactless Reader Enabled | You can enable or disable the Contactless Reader capabilities of your device. Contactless smart card readers use radio waves to read and write data on a smart card. |
| Magnetic Stripe Reader Enabled | You can enable or disable the Magnetic Stripe Reader capabilities of your device. A magnetic stripe reader reads the information encoded in the magnetic stripe of cards. |
Terminal User Guide
The workflow in the Switch Terminal Application was designed to be user-friendly, simple, and future-proof.
Most operations you are able to execute when using the Terminal Application are linear and produce clear results, making the interaction simple and straightforward. You have access to multiple tools to help you search transactions and the details of your operation so that you can always keep an eye on your store’s performance.
Payments
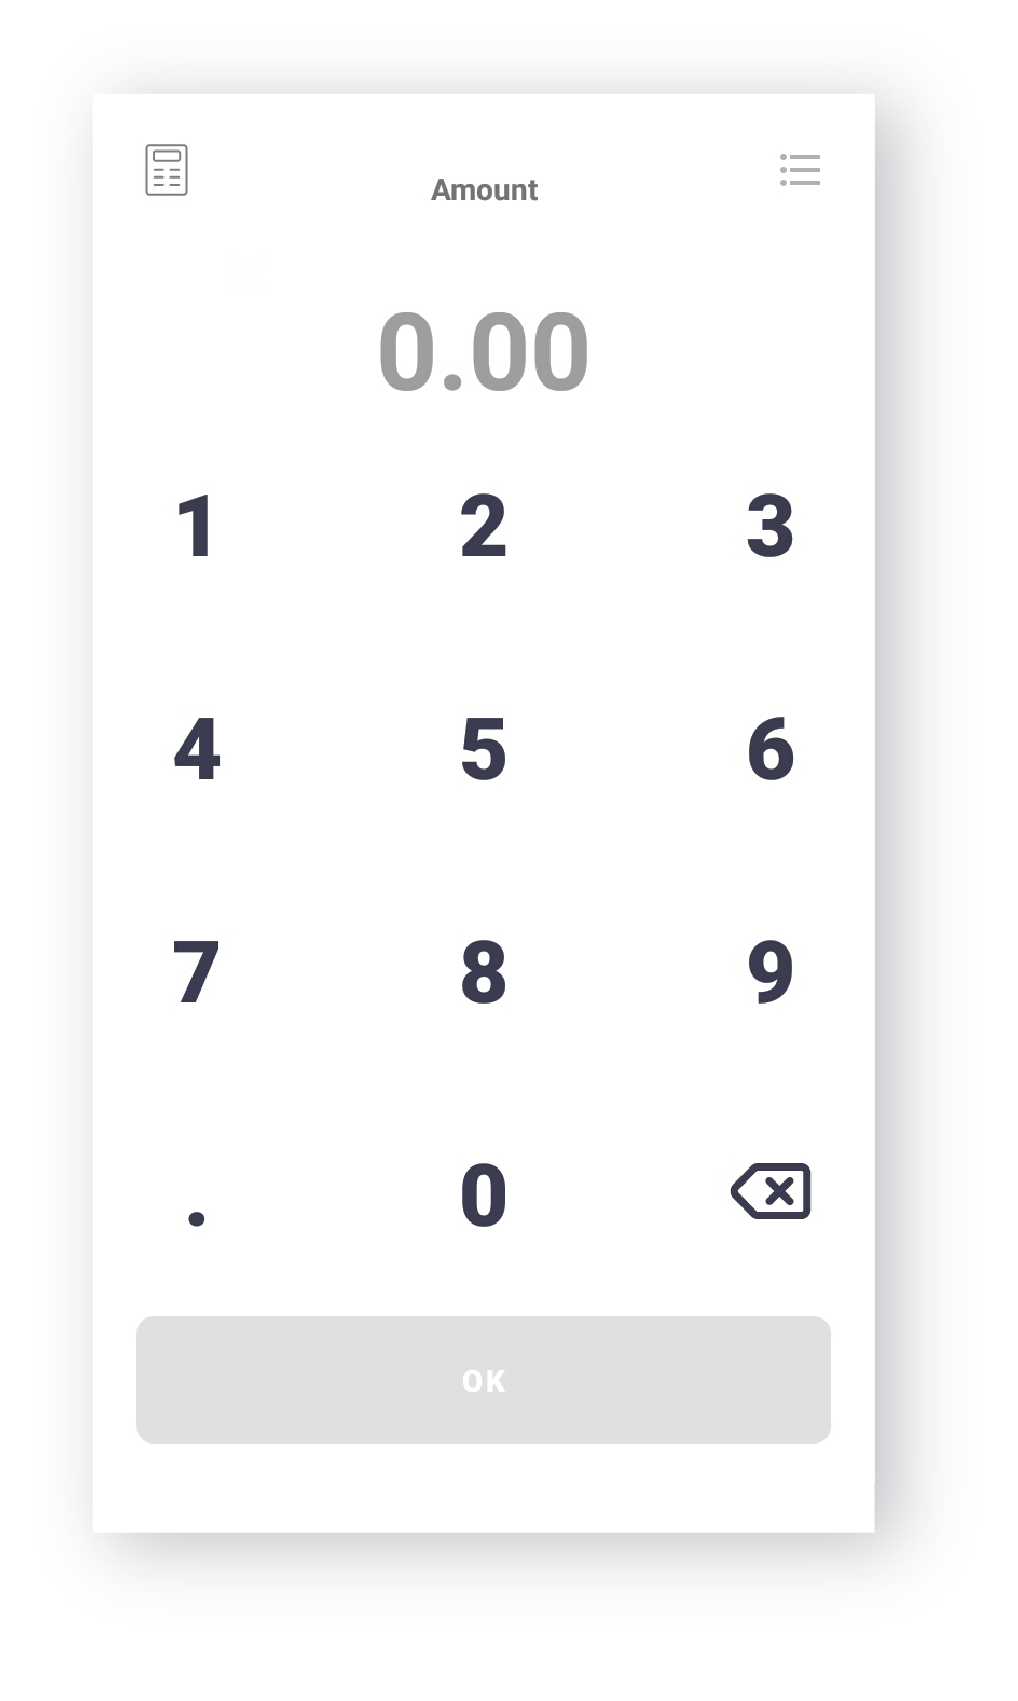
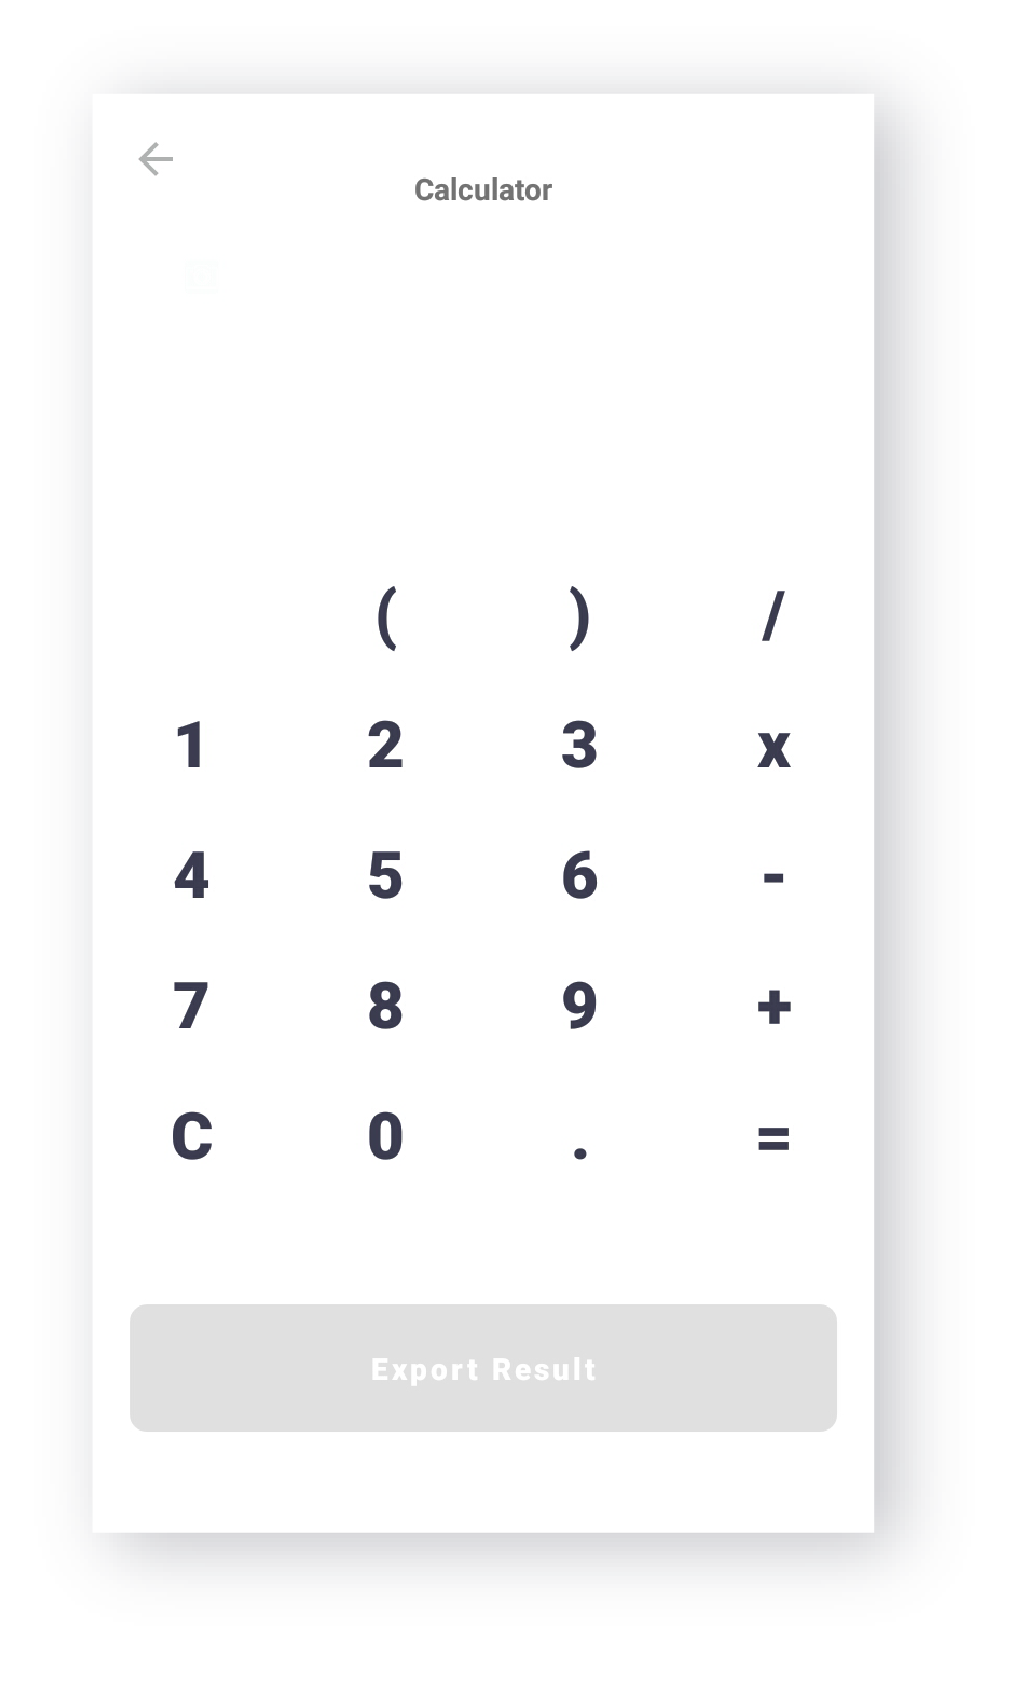
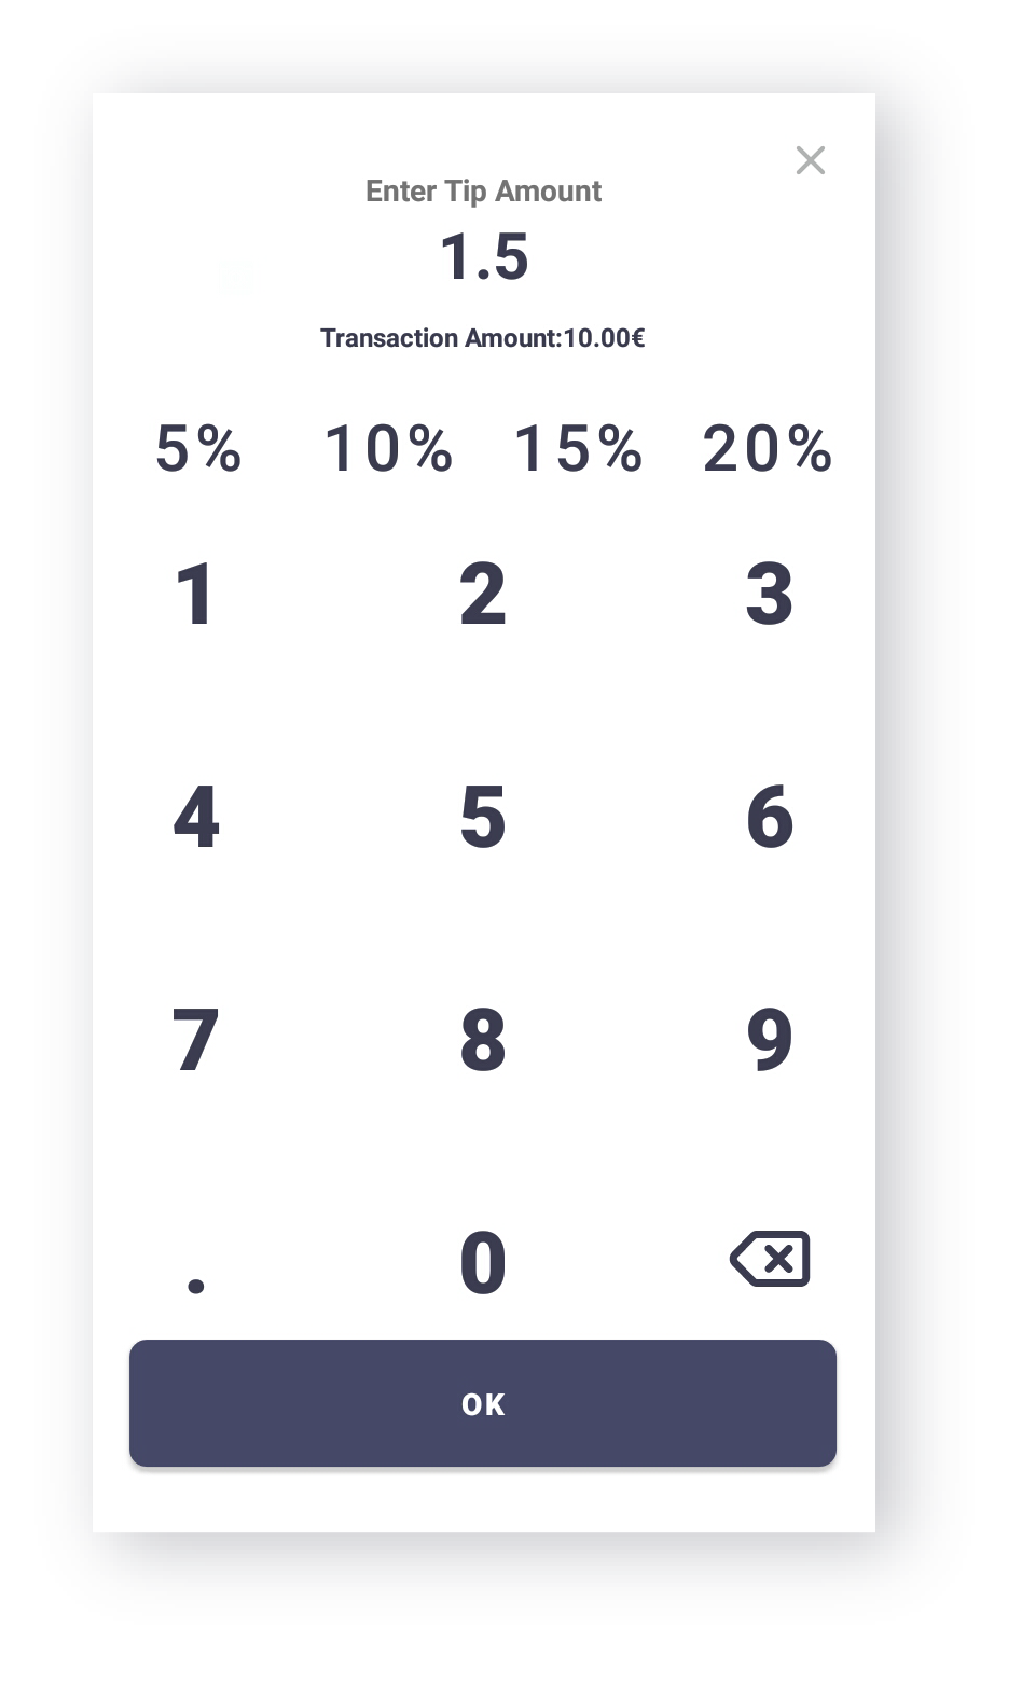
- Input amount using the Terminal screen. In the Terminal, a calculator is available to ease cash payments.
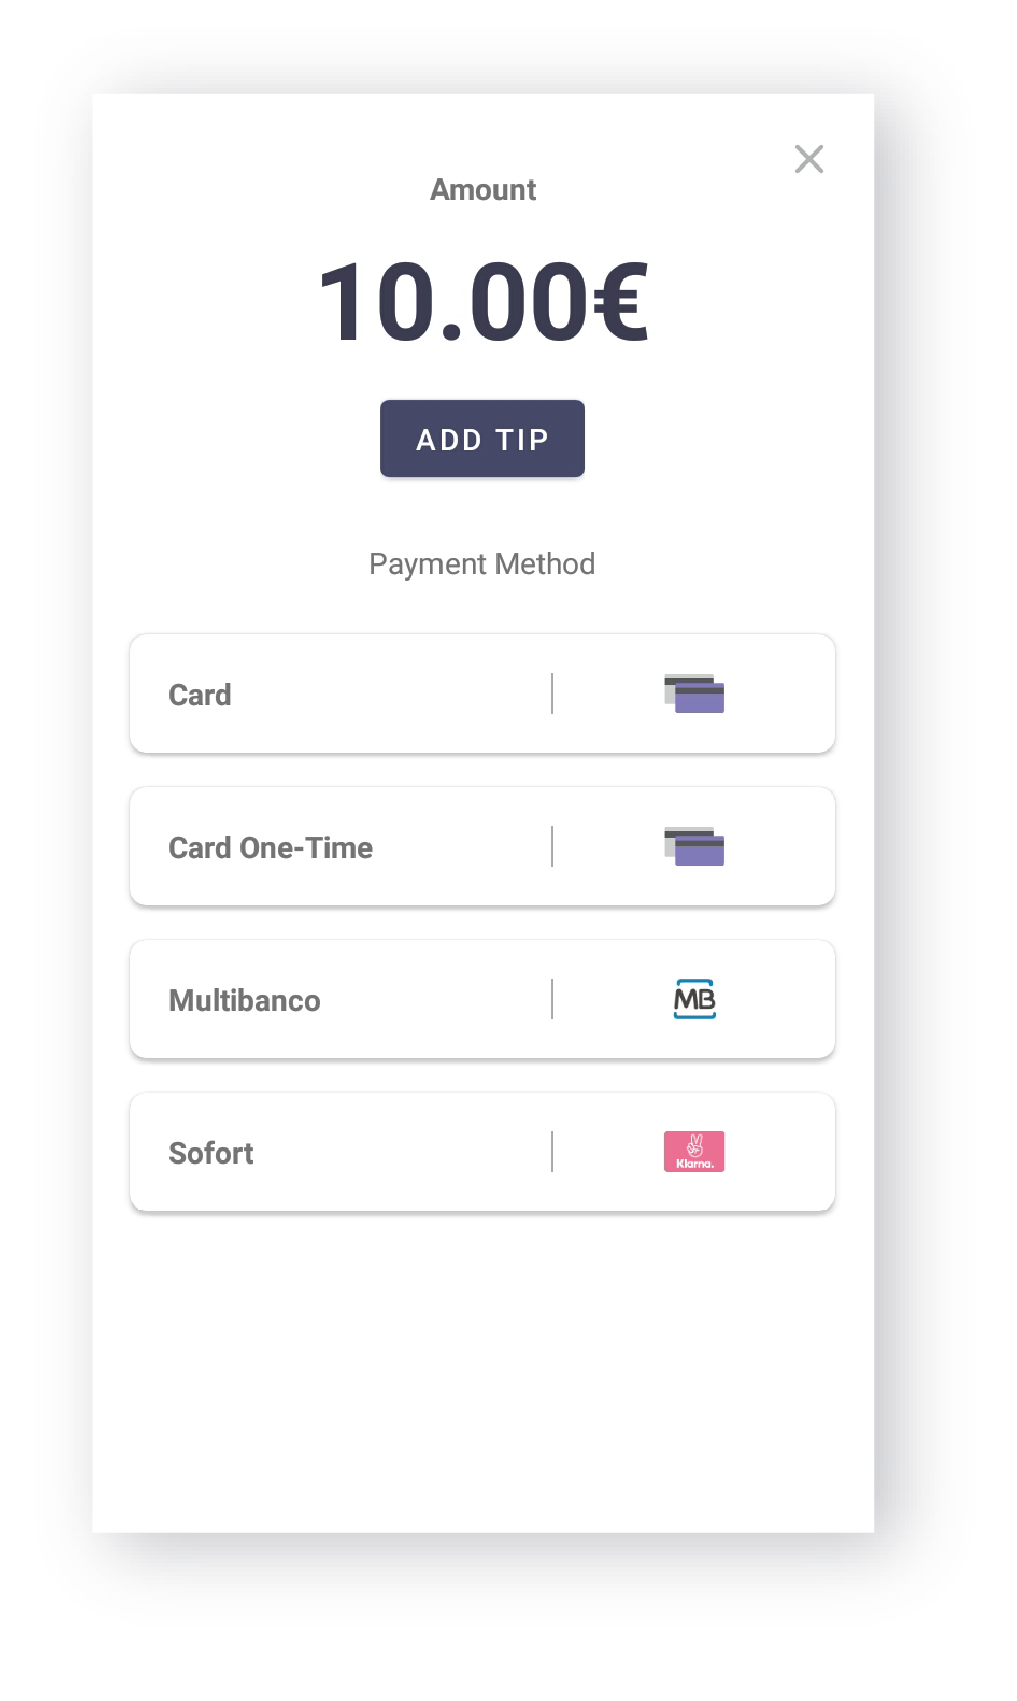
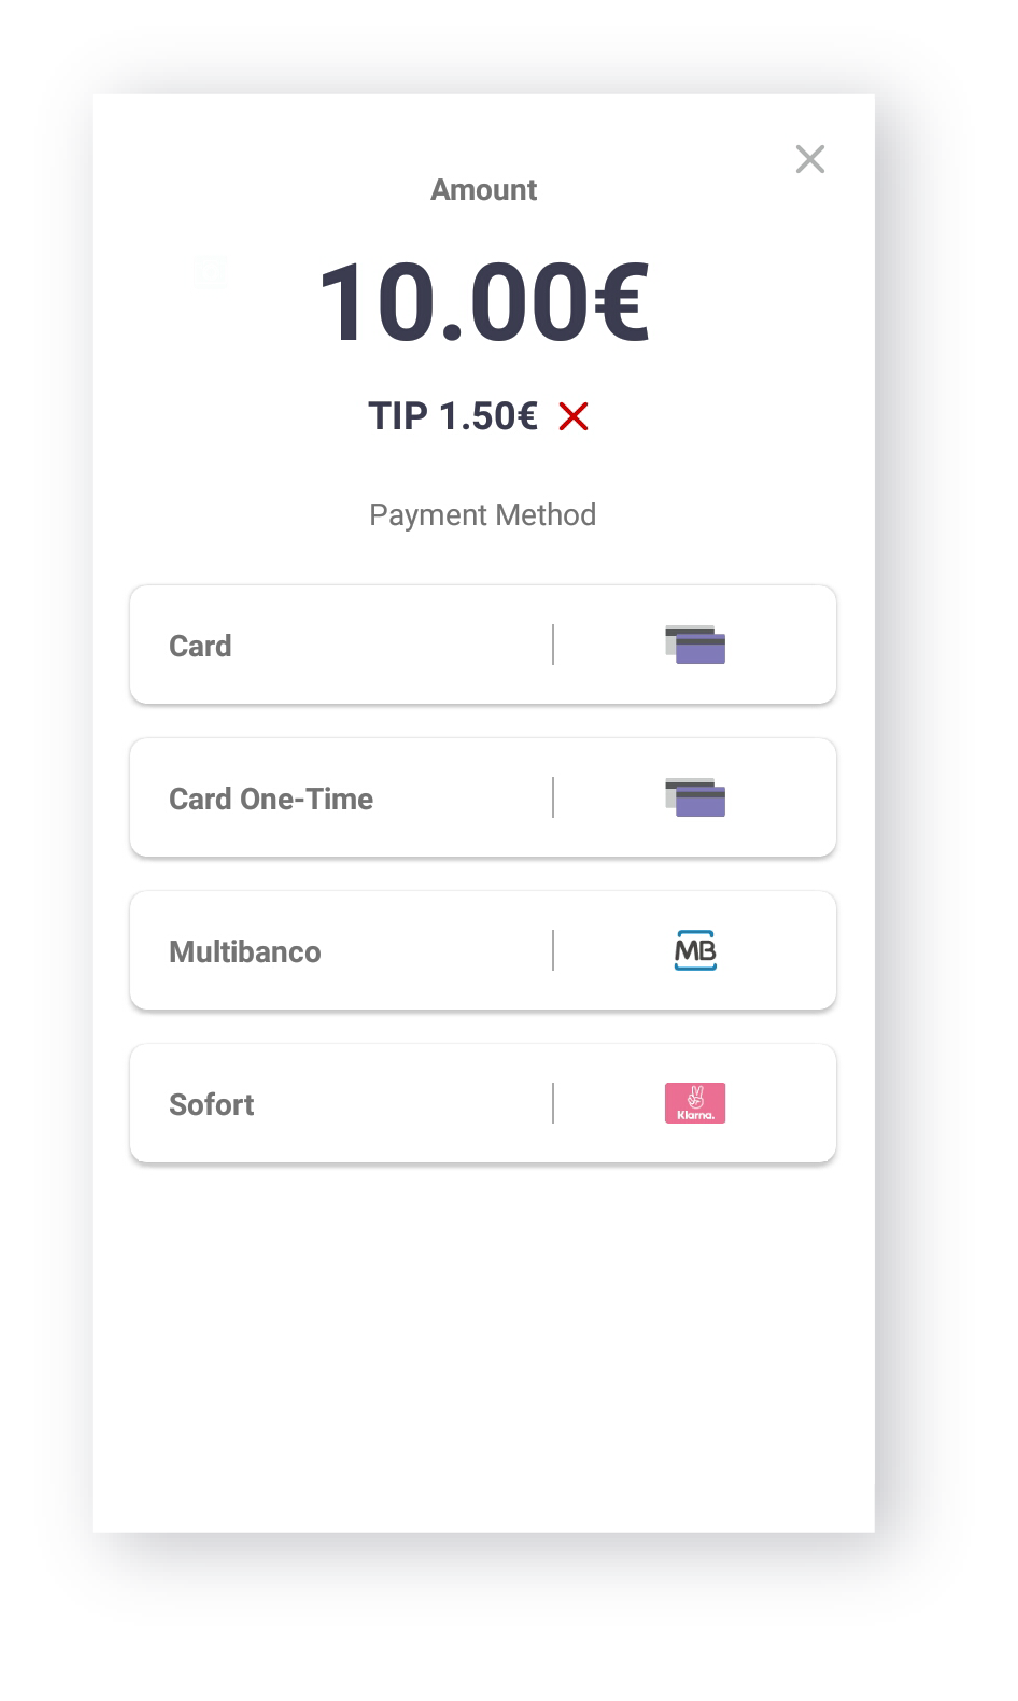
- Consumers can choose whether they would like to add a tip to the original price or not, just use the Add Tip option. Tips can be calculated by a percentage of the amount to be paid or you can input a specific value.
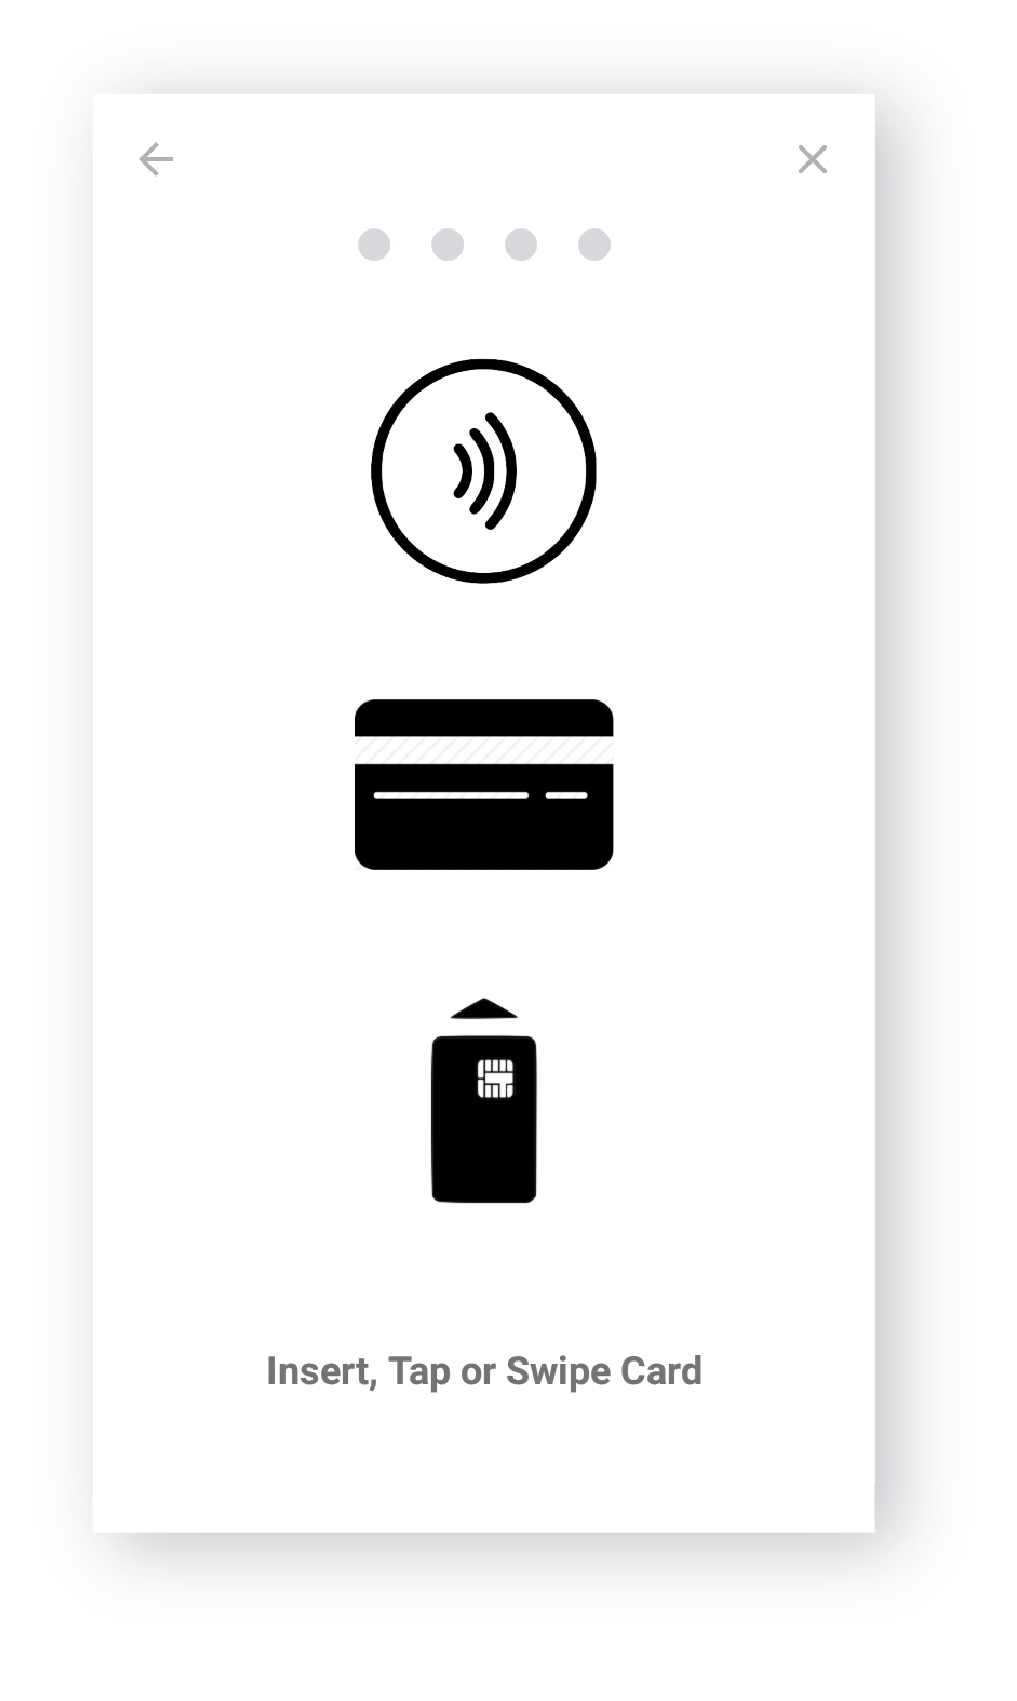
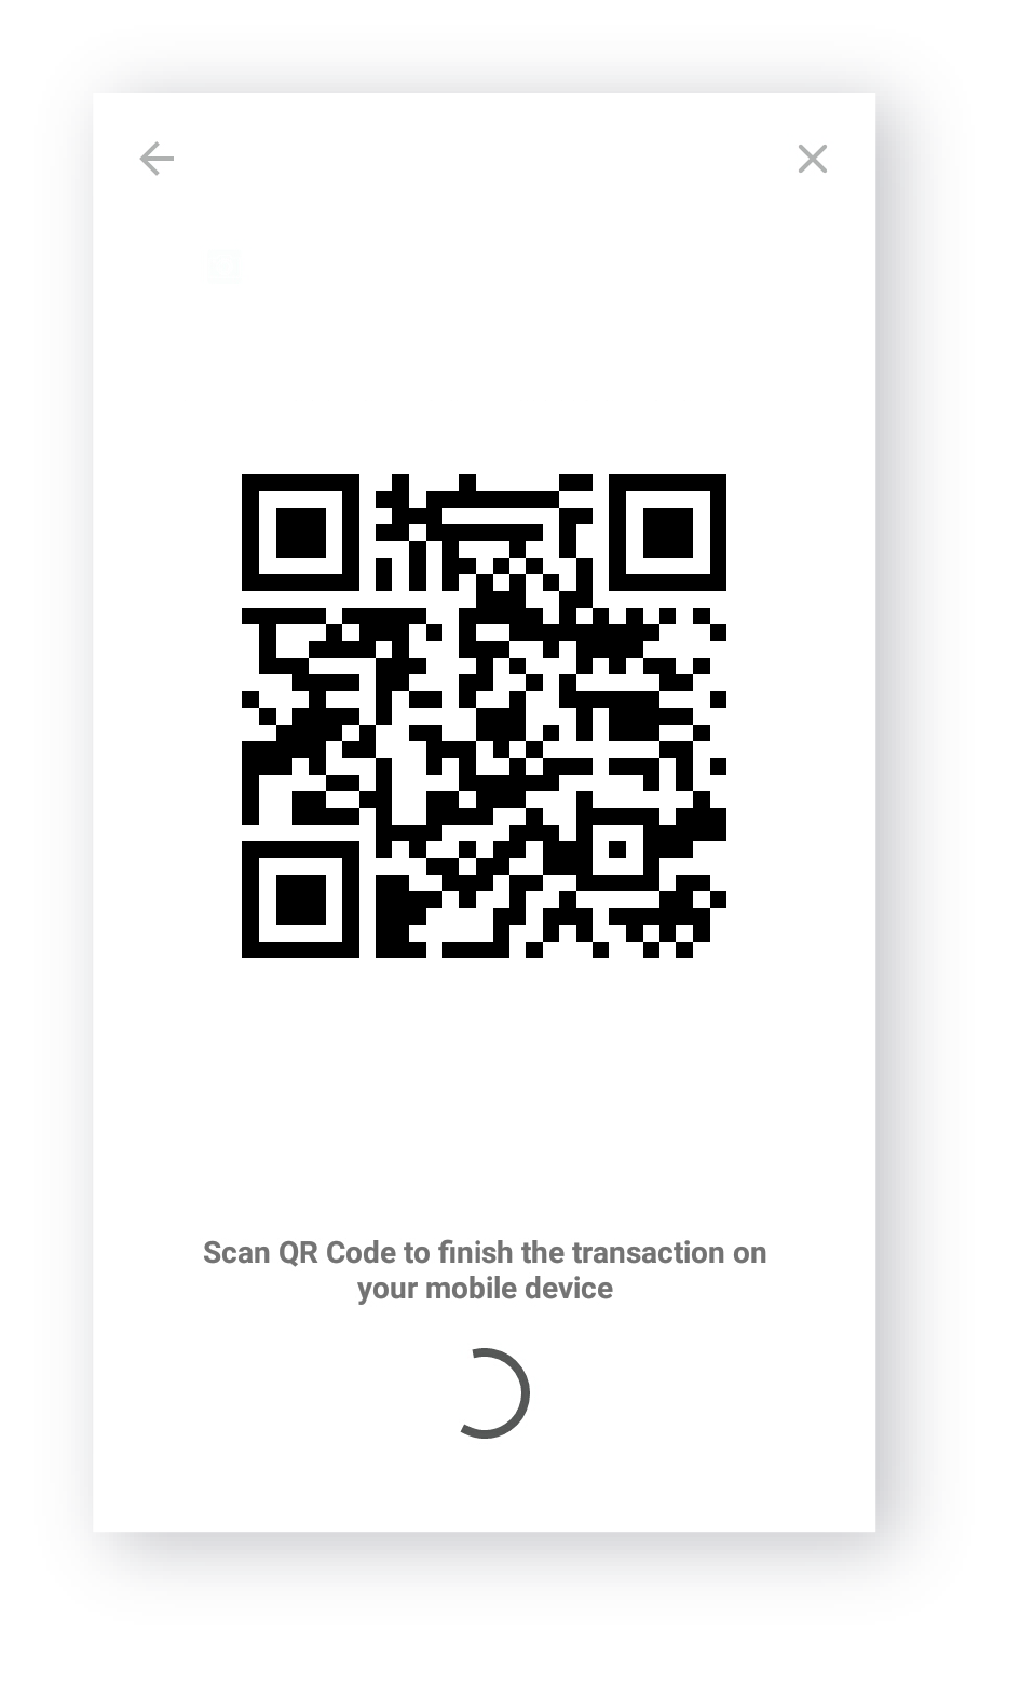
- Consumers can choose how they want to pay. They can make use of their card as usual, or proceed with the alternative payment methods you decide to remotely deploy to the POS (e.g. PayPal, Alipay). When using alternative payment methods, the user interface will display a QR code that customers can scan using their mobile devices. This will redirect them to a checkout page where they can proceed with the payment.
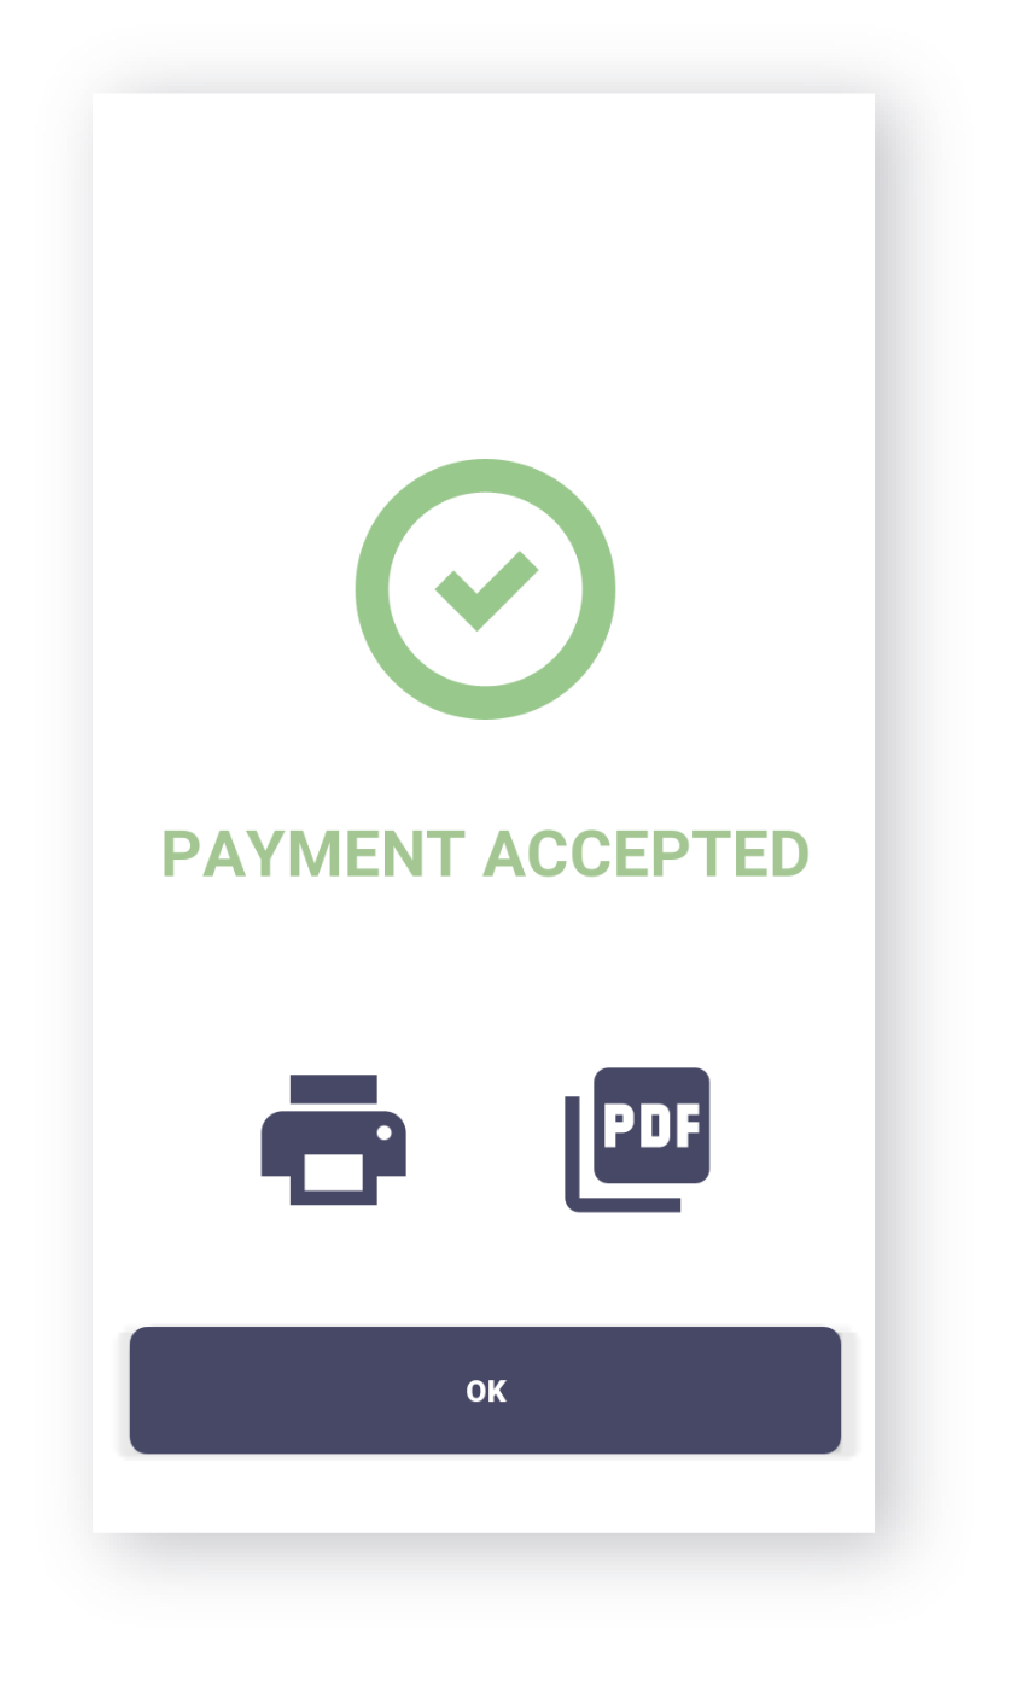
- After each payment, consumers can choose between a printed or digital receipt.
Transactions and Refunds
All transactions are listed on the Switch Dashboard, but you also have access to the ones processed during the current session right on the Terminal Application.
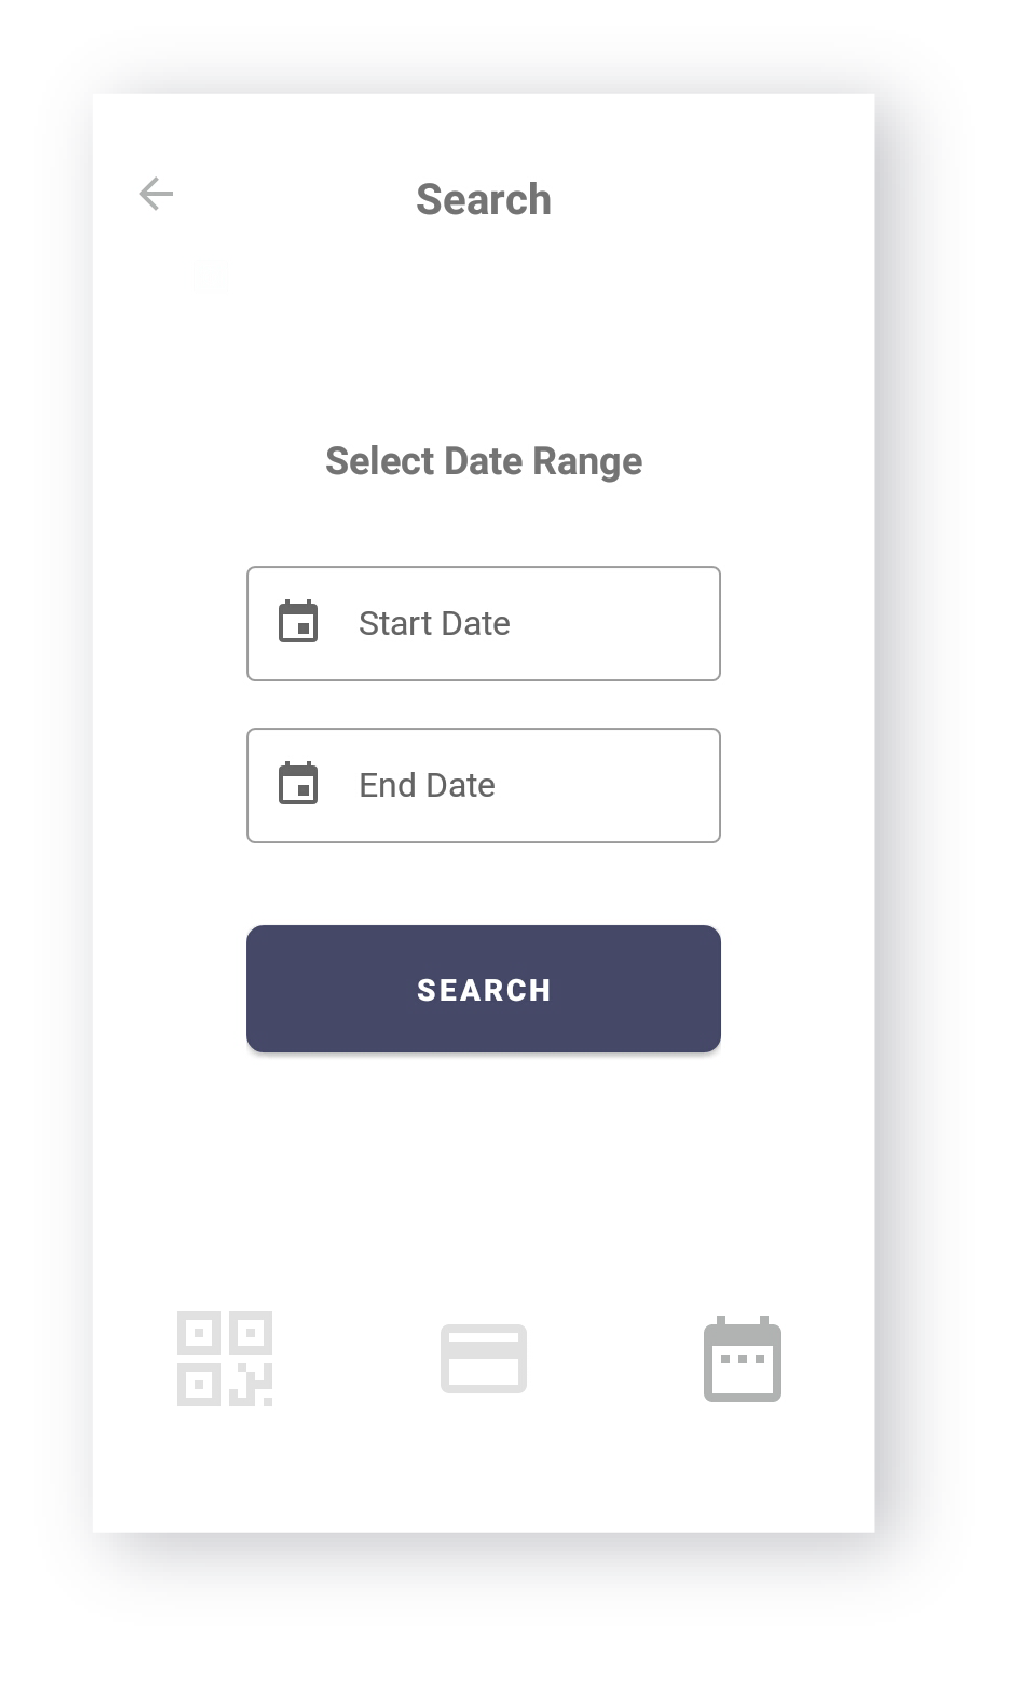
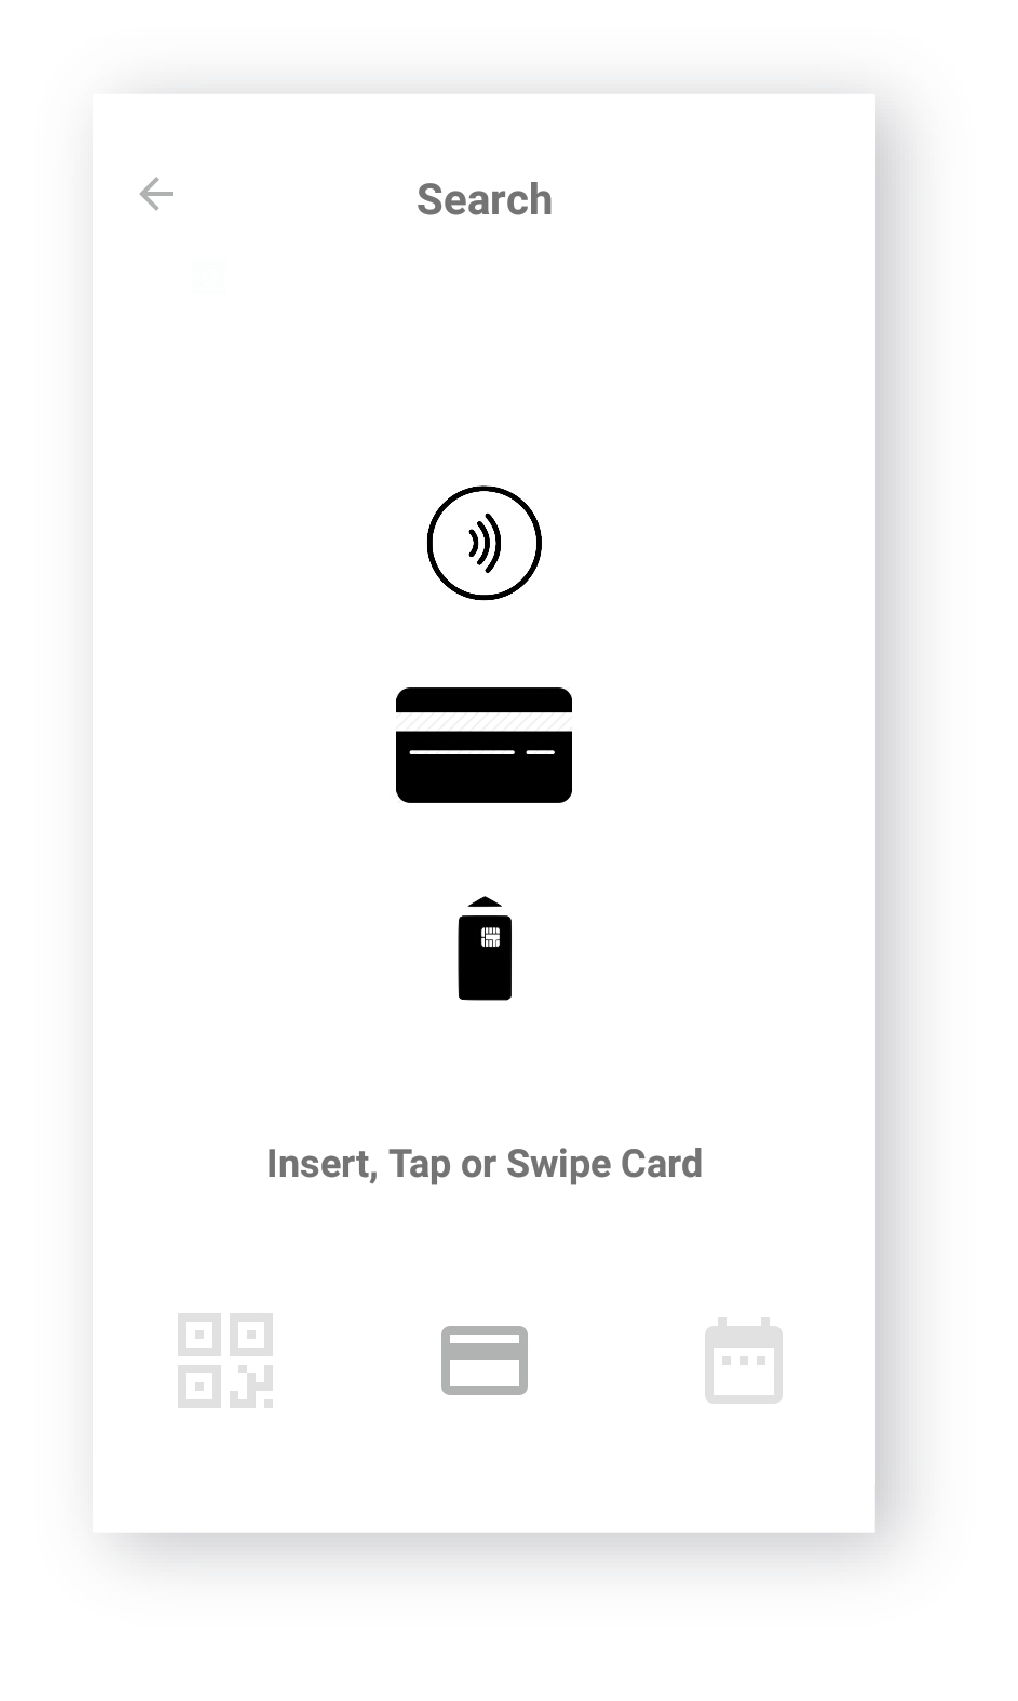
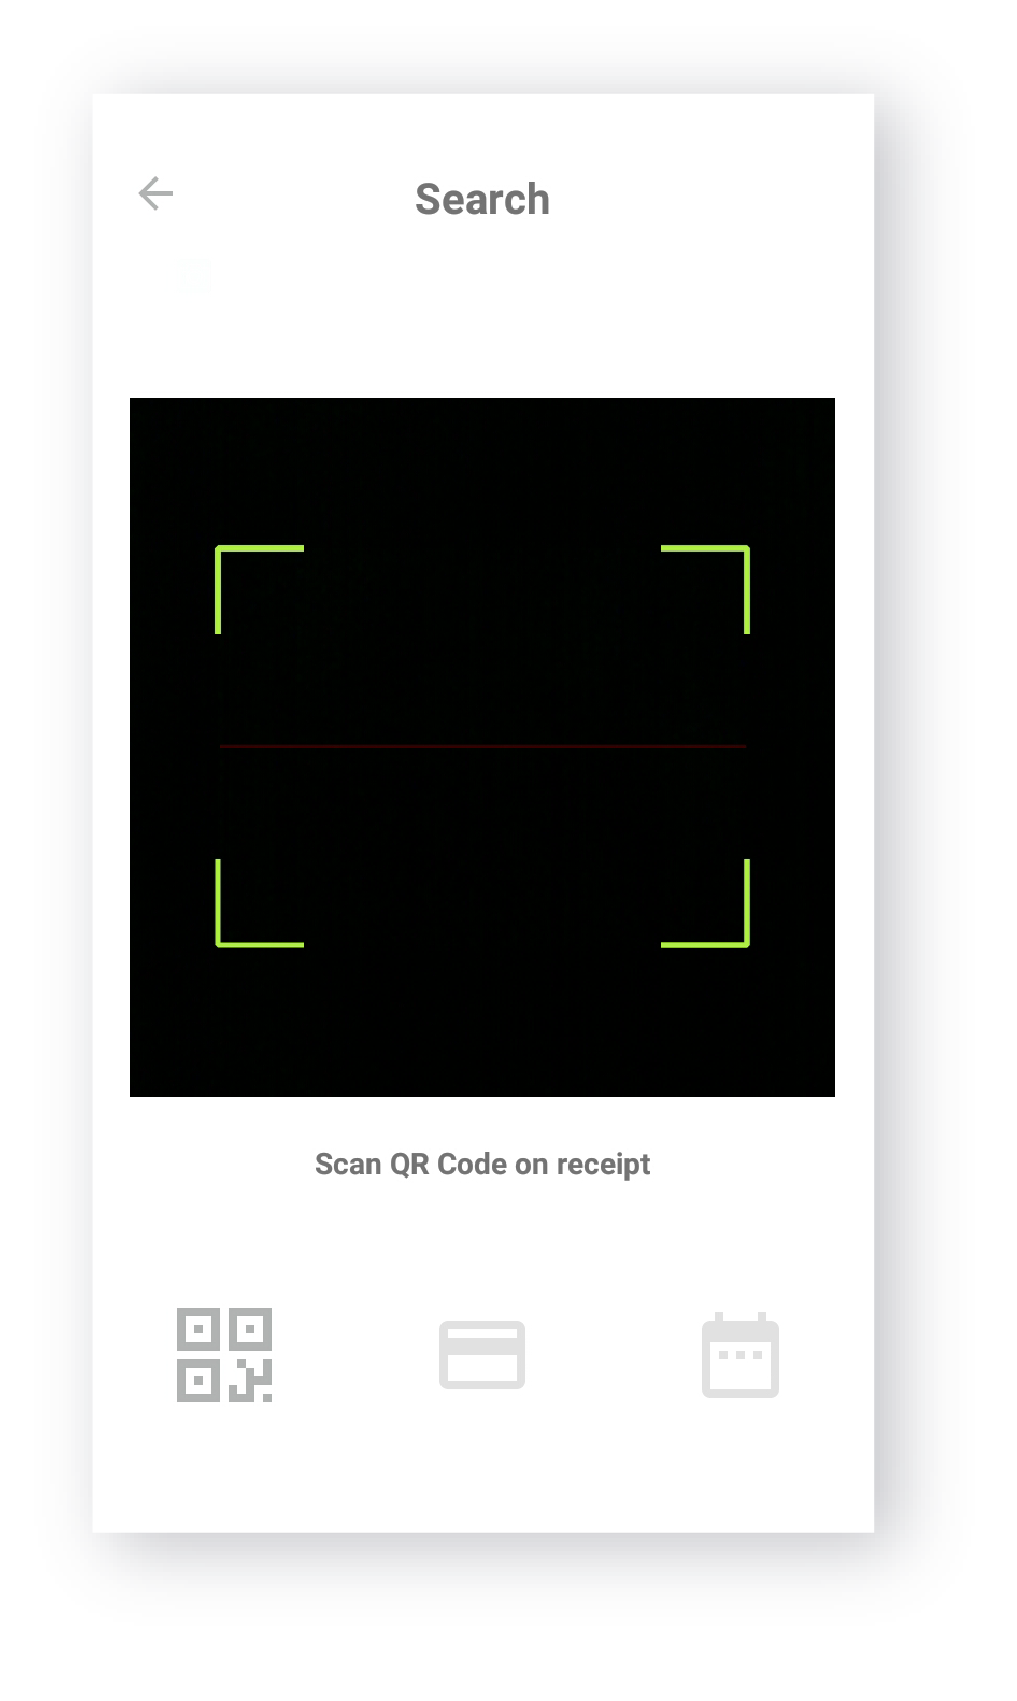
- To search transactions, you can use the QR code on each receipt or any other detail about the transaction. This includes the timeframe in which the transaction was handled and the payment instrument used. Everything is searchable and all data is available in real-time.
- To proceed with refunds, simply find the transaction you would like to refund and establish the refund amount, you can create partial or total refunds.
Settings and Sessions
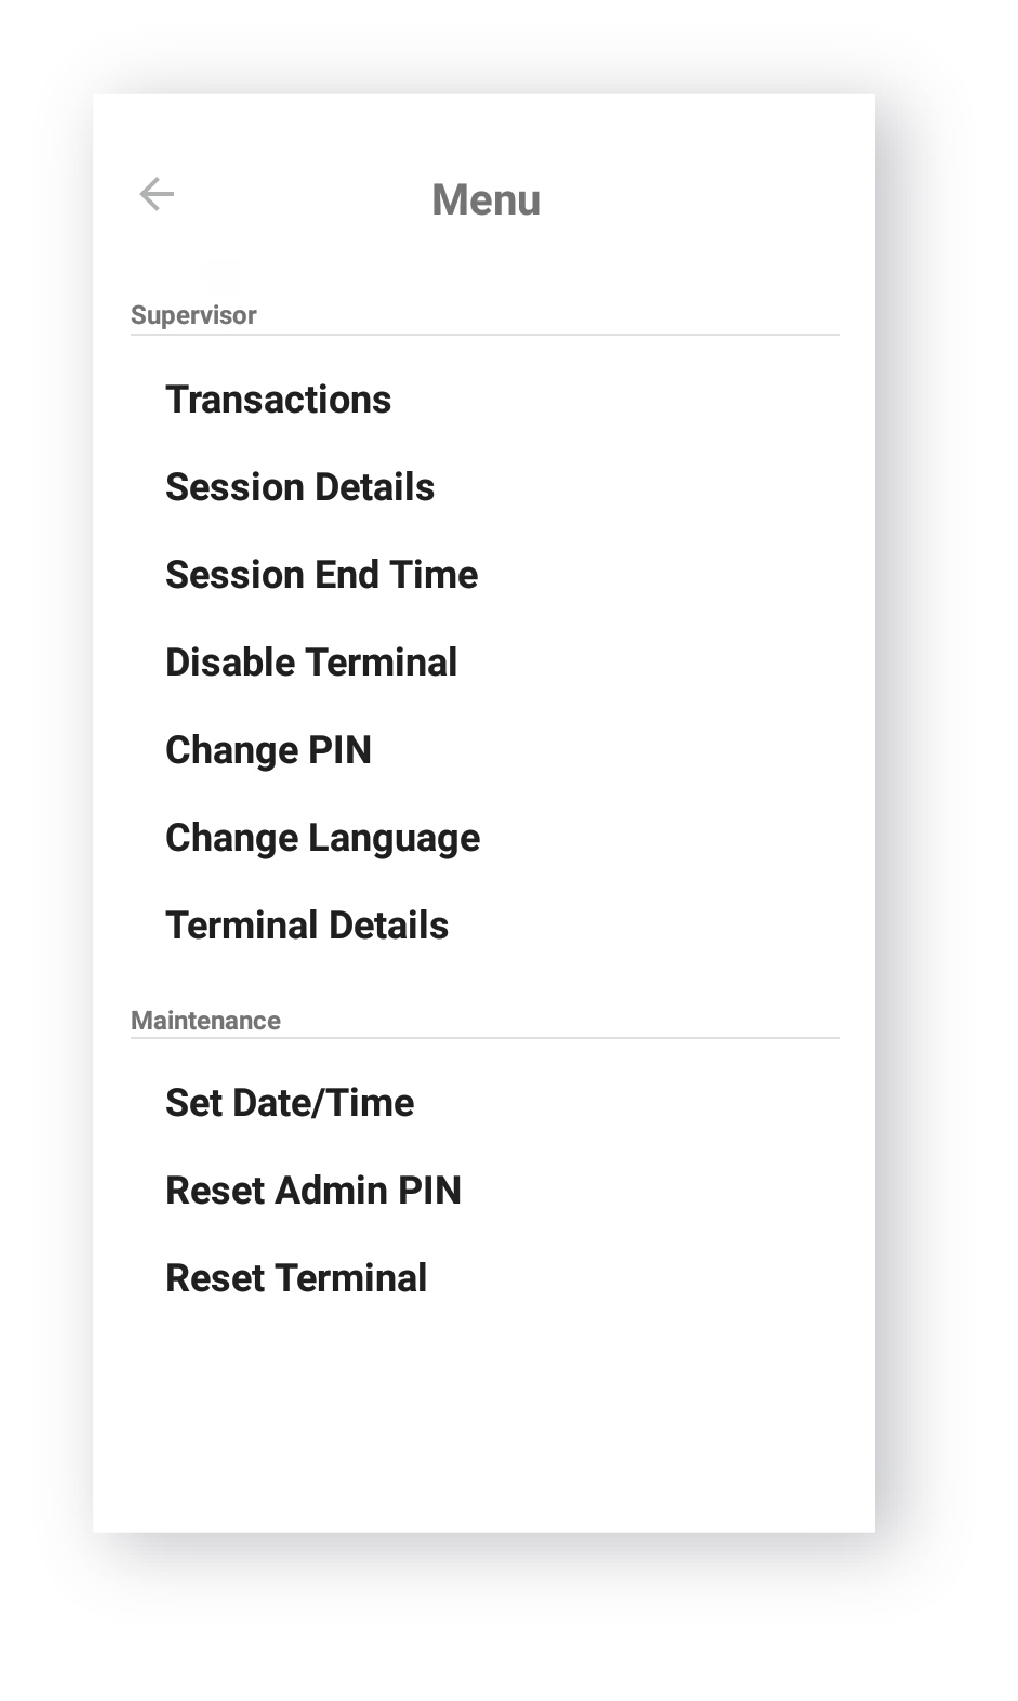
The main menu in the Terminal is divided into two different sections: Supervisor and Maintenance.
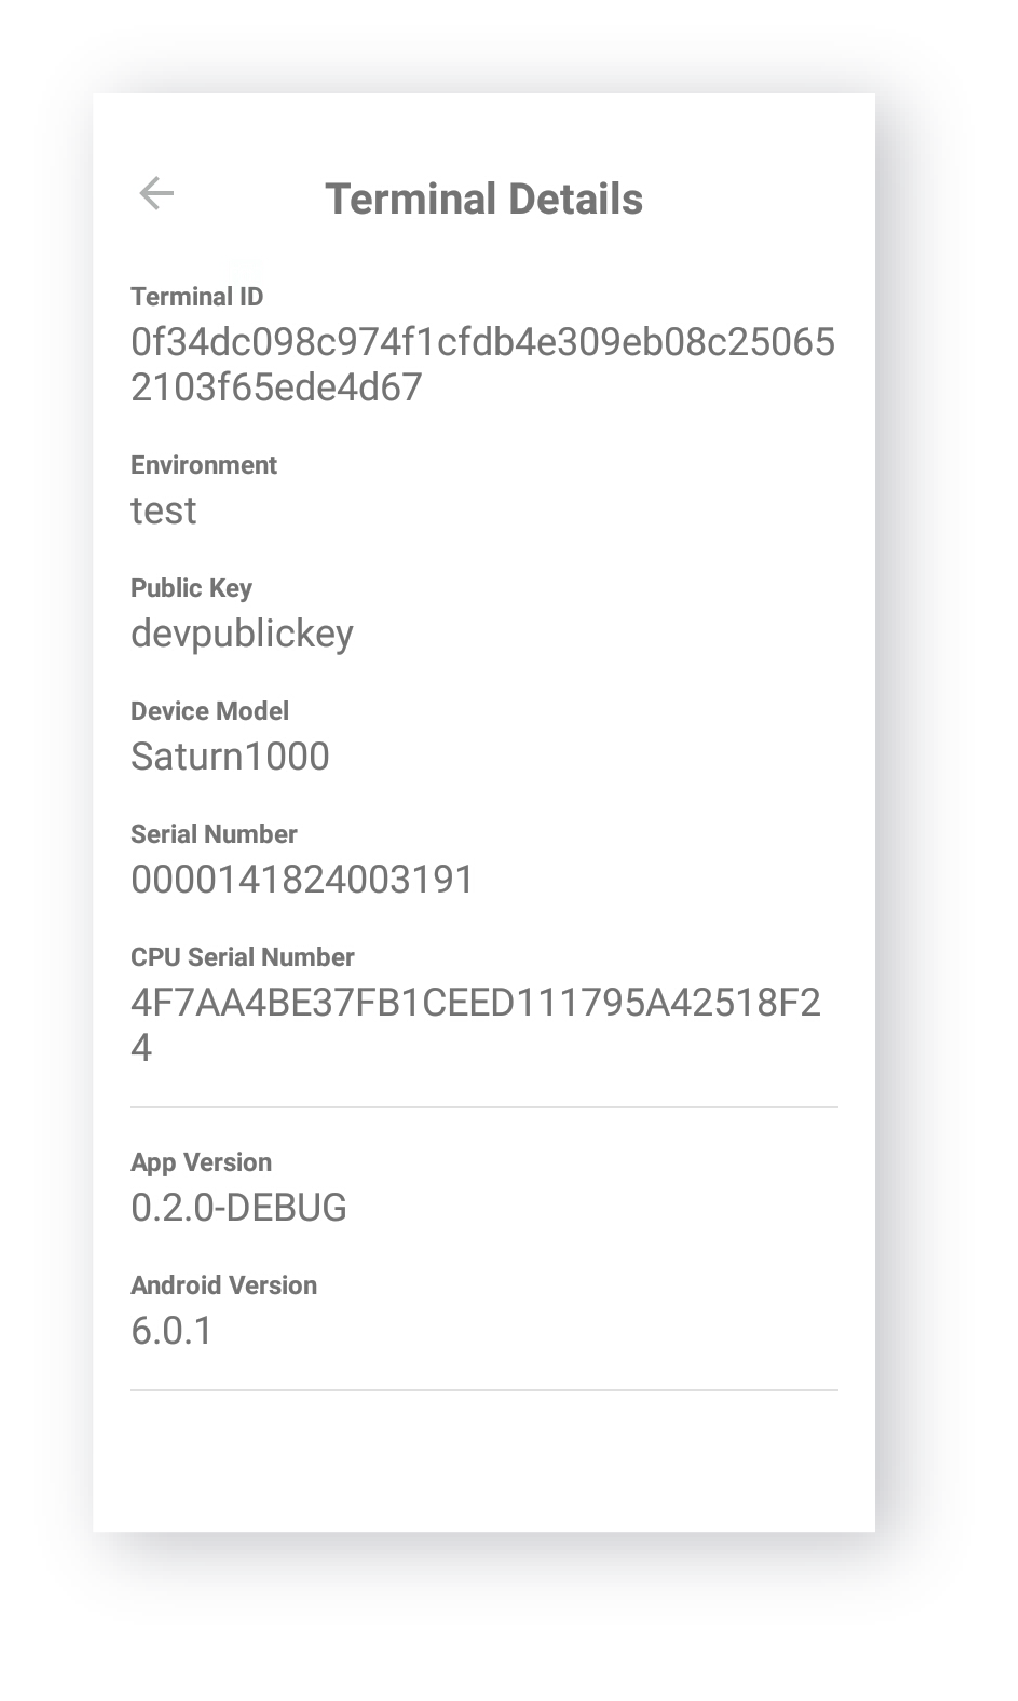
Under the Supervisor section, you can find your list of transactions and the details of the current session, as previously described. You can also go over the terminal details, disable the device, and change the default language. Supervisor Terminal options can only be accessed with a Supervisor PIN, the prompt to input this PIN will appear upon selection.
Maintenance includes the more technical details of the Terminal management, apart from the day to day operations available to supervisors. This includes making changes to the date/time of the device and resetting the Terminal completely.
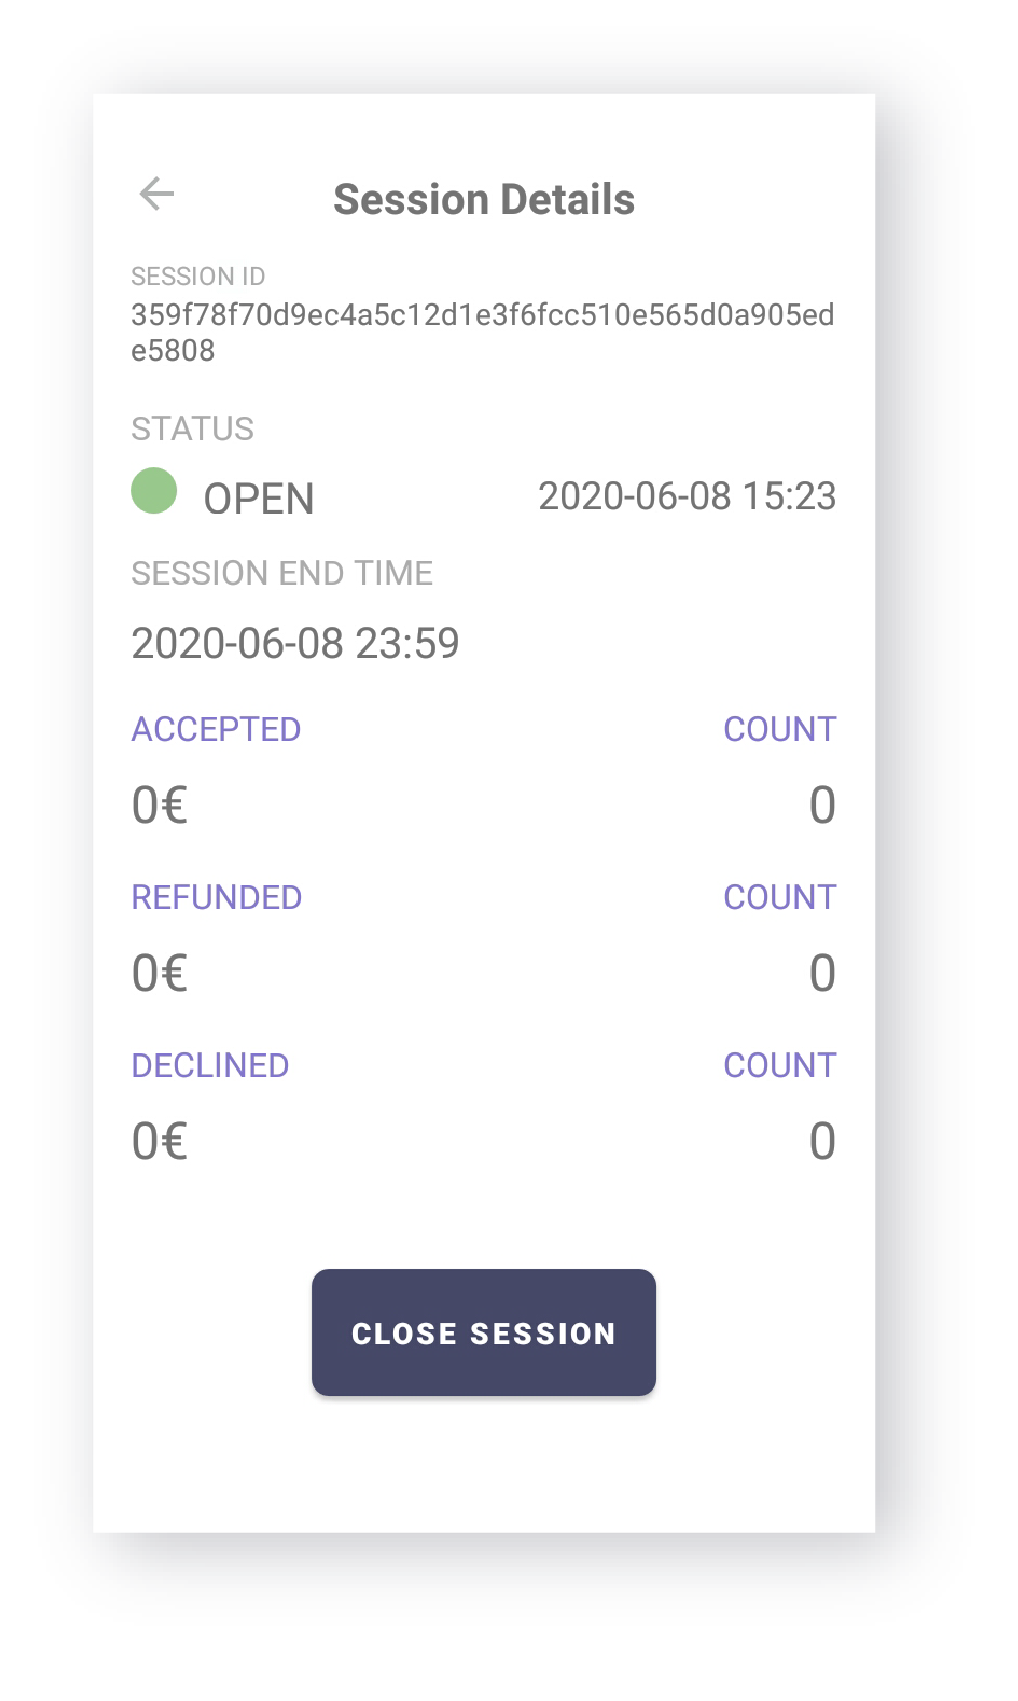
Terminal sessions can either be enabled manually, or scheduled in advance. You can check each session’s performance, with amounts processed, the number of transactions, refunds, and declines.
In Terminal Details, you can get an overview of the features and current state of your device. This includes the Terminal ID, the environment of your operations, keys, and details on your Terminal and Terminal Application version.